An example of developing the simply application of “Windows Forms” type in C++ language by using MS Visual Studio
In the article is considered an example of creating an application that calculates the area of triangle by using Heron’s formula. Application is realized in Microsoft Visual Studio as Windows Forms Application.
In the topic is considered programming of event of click on the button. Also are considered the features of interconnection of program code with components Label, Button, Edit.
Content
- The mathematical formulation of the problem
- Progress
- 1. Creating a project as Windows Forms Application
- 2. Placing components on the form
- 3. Setting the properties of components
- 4. Programming of clicking on the button “button1“
- 5. Running the project
Search other websites:
The mathematical formulation of the problem
The lengths sides a, b, c of the triangle are specified. By using Microsoft Visual Studio need to develop the application, which calculates the area of triangle by Heron’s formula. Application must realized in C++ as Windows Forms Application.
The Heron’s formula to calculate the area of triangle:
![]() where
where
a, b, c – sides of triangle;
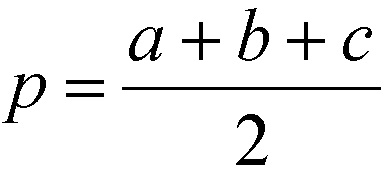
p – semiperimeter, that is calculated by formula:
 ⇑
⇑
Progress
1. Run Microsoft Visual Studio. Create a project.
Run MS Visual Studio. Create a project as Windows Forms Application based on the “Visual C++” template. An example of creating the project of Windows Forms Application type in C++ and created files types are described here.
Save the file, specify the any name (eg “MyApp01“).
As a result, the main form of application will be created (Figure 1).
By default, the class named “Form1” is created. The file with name “Form1.h” corresponds to this class (Figure 1). To go to the viewing code mode of file “Form1.h” there are three ways:
– command View->Code (Figure 2);
– command “View Code” from the context menu, which is called by clicking on the title of file “Form1.h” in Solution Explorer (Figure 3);
– click on the corresponding button (View Code or View Designer) in Solution Explorer (Figure 4).
 Figure. 1. Main form of application
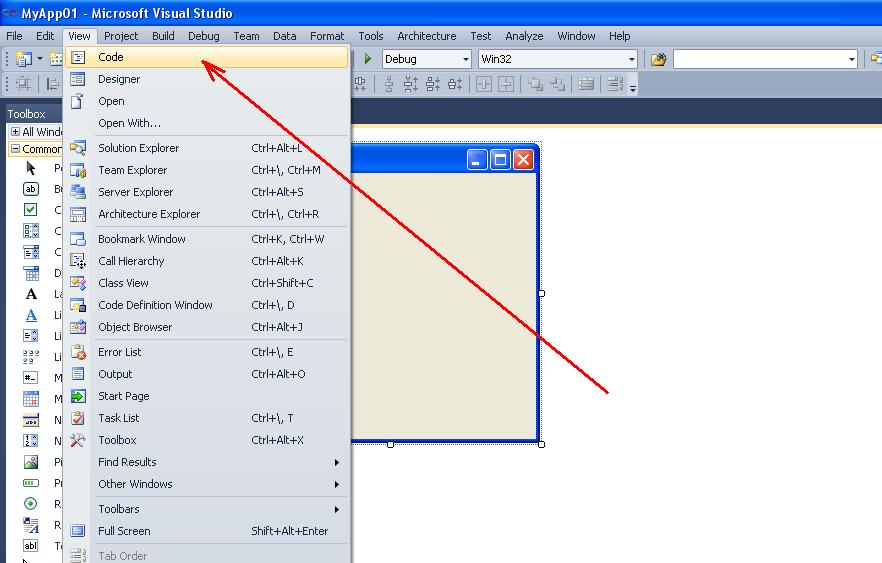 Figure 2. Command “Code” from menu “View“
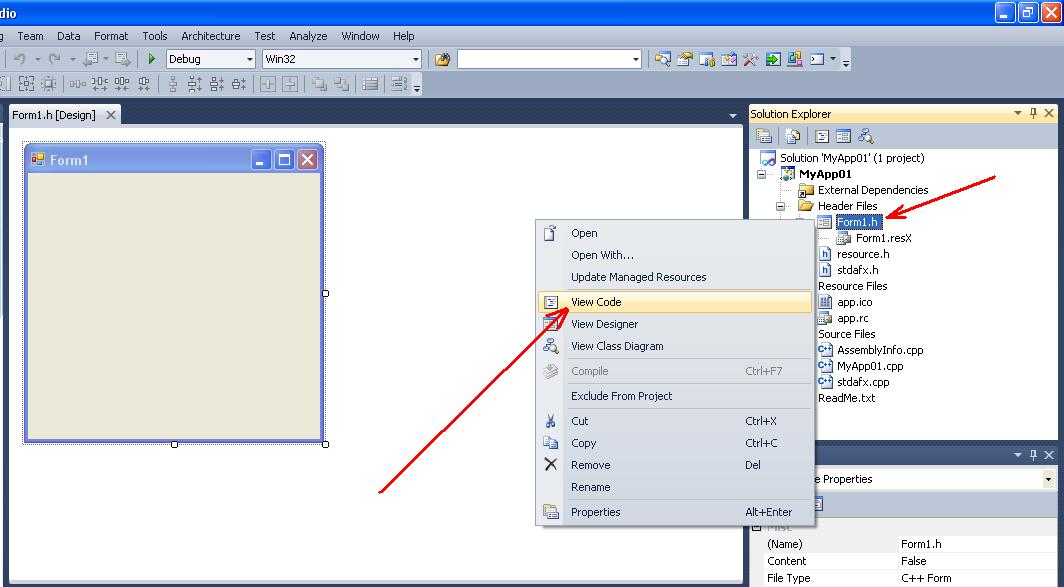 Figure 3. Calling the mode of code viewing from context menu
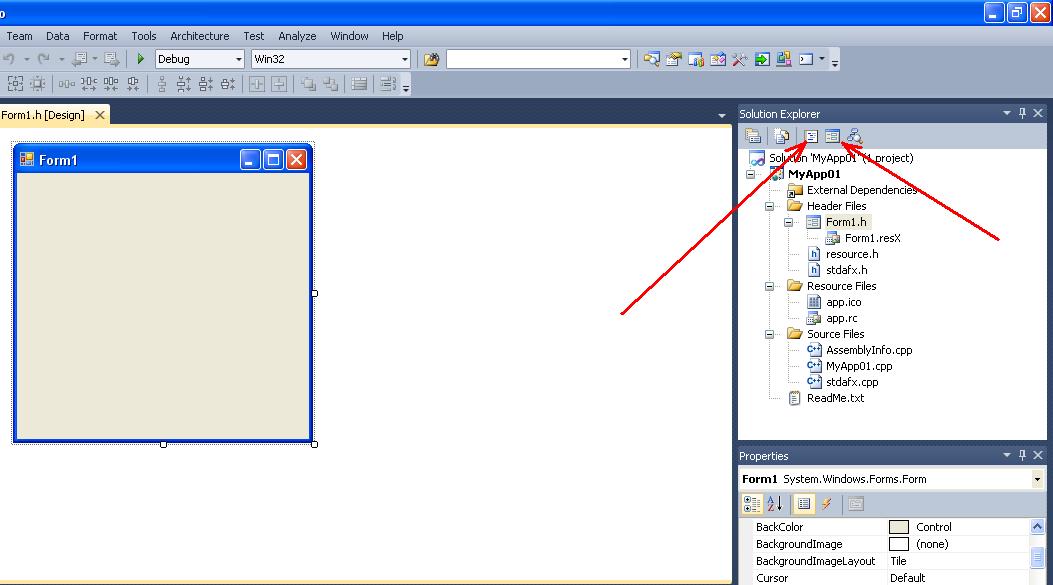 Figure 4. Calling the mode of code viewing from Solution Explorer
As a result of go to the viewing mode, the window, which includes text of file “Form1.h“, will be opened.
 Figure 5. The source code of file “Form1.h“
Thus it is possible to switch between the modes of design and editing the code of source of project.
The form class consists:
– constructor Form1();
– destructor ~Form1();
– method InitializeComponent(), where you can initialize the internal variables.
⇑
2. Placing components on the form.
For the program you need to place on the form corresponding components. To do placing of components, you need to go to the design mode using one of above mentioned methods.
Components are placed on the panel Toolbox (Figure 6).
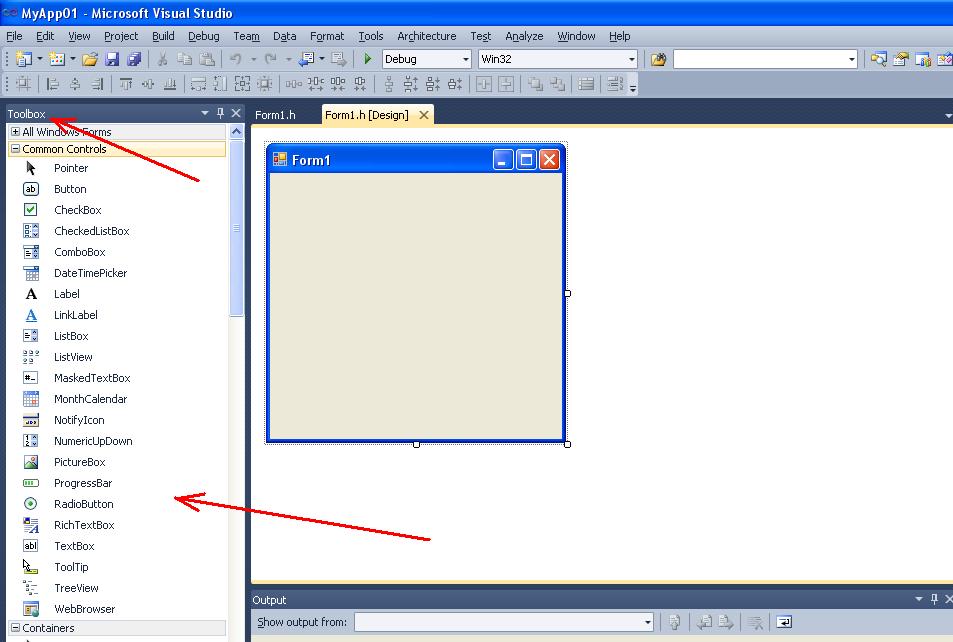 Figure 6. Palette Toolbox
In our case the following components are placed:
– three components of type Label (Figure 7). They intended for displaying information messages “a = “, “b = “, “c = “. As result, the three objects (instances) are created: label1, label2, label3;
– three components of type TextBox (input string) – for inputting of values of variables a, b, c (Figure 8). Three objects named textBox1, textBox2, textBox3 are created;
– one component of Button type (Figure 9). It intended to realize commands of area calculating and calling the corresponding of event handler. The object (instance) named button1 is created;
– one component of Label type (Figure 10). It intended to output the result (area of triangle). The object with name label4 is created.
After placing the components form will look as shown in Figure 10.
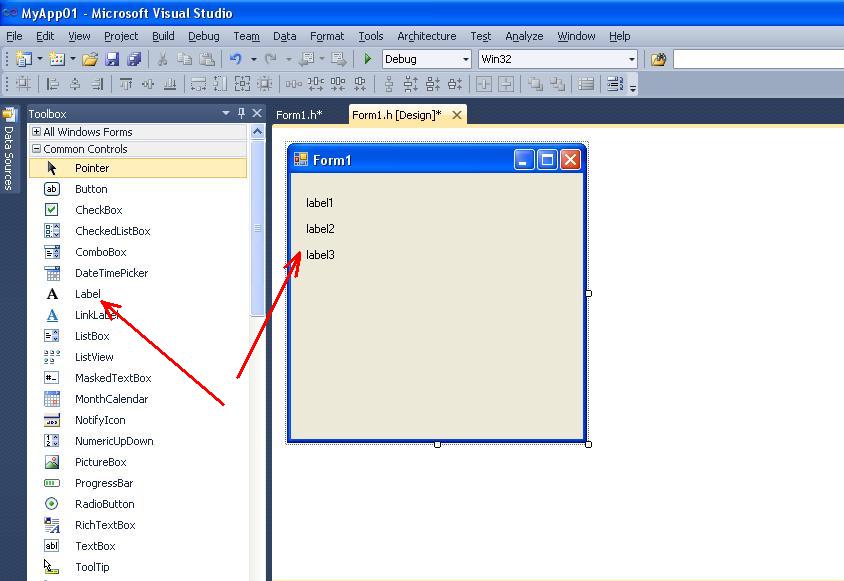
Figure 7. Component Label
 Figure 8. Component TexbBox
 Figure 9. Component Button
 Figure 10. Component Label
⇑
3. Setting the properties of components.
In order to form had more descriptive view for the task solution, you need to configure it’s properties and properties of components placed on it.
To set the properties of form and properties of components is used window “Properties” (Figure 11). This window is called by command
View->Properties Window
or F4 key.
 Figure 11. The “Properties” window
To change the form title, previously you need to select the form (using mouse). After that, in the title of window “Properties” may appeared the title of form Form1. The next step, property “Text” you need set to value “Area of triangle” (Figure 12).
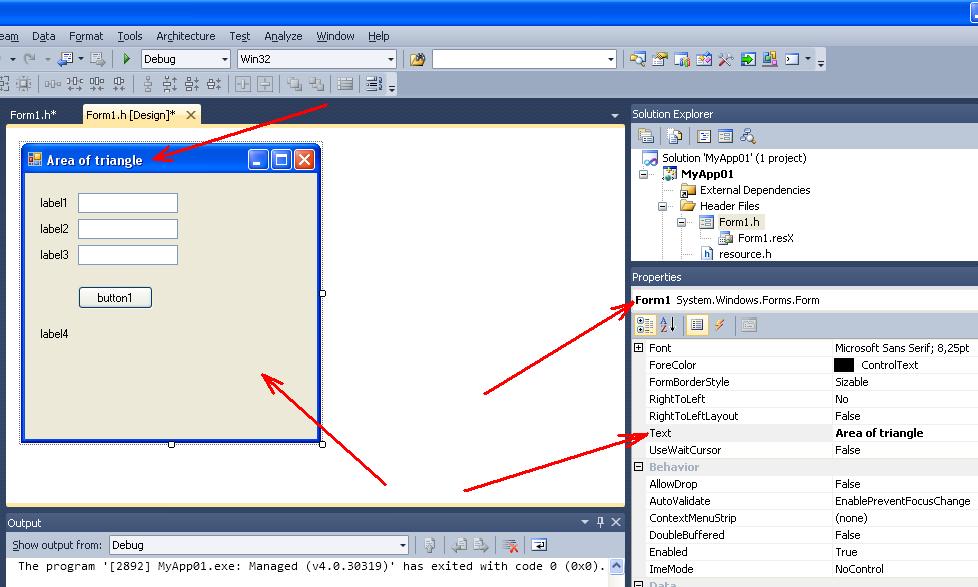 Figure 12. The setting of title the main form of the program.
Likewise the properties of components, which are placed on the form, are set.
Set such properties of components:
– in the component label1 property Text = “a = “;
– in the component label2 property Text = “b = “;
– in the component label3 property Text = “c = “;
– in the component label4 property Text = “Area of triangle“;
– in the component button1 property Text = “Calculate“.
After executed actions, form will look like as shown in Figure 13.
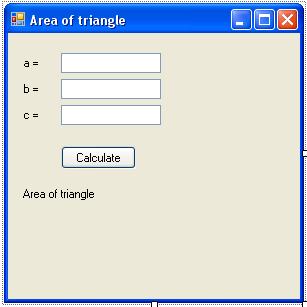 Figure 13. Form view after setting the components
⇑
4. Programming of clicking on the button “button1“.
The result of program work is calculating of area of triangle. The calculating occurs when user clicks on the button “Calculate“. As a result, the event Click is generated. In program the code snippet corresponds to this event. This code snippet is named event handler. This code snippet is formed by Microsoft Visual Studio.
To call the event handler of clicking on the button1, you need to do the following actions (Figure 14):
– select component button1;
– activate tab “Events” in the “Properties” window;
– do the double click by mouse in the event list in the field of inputting the event Click.
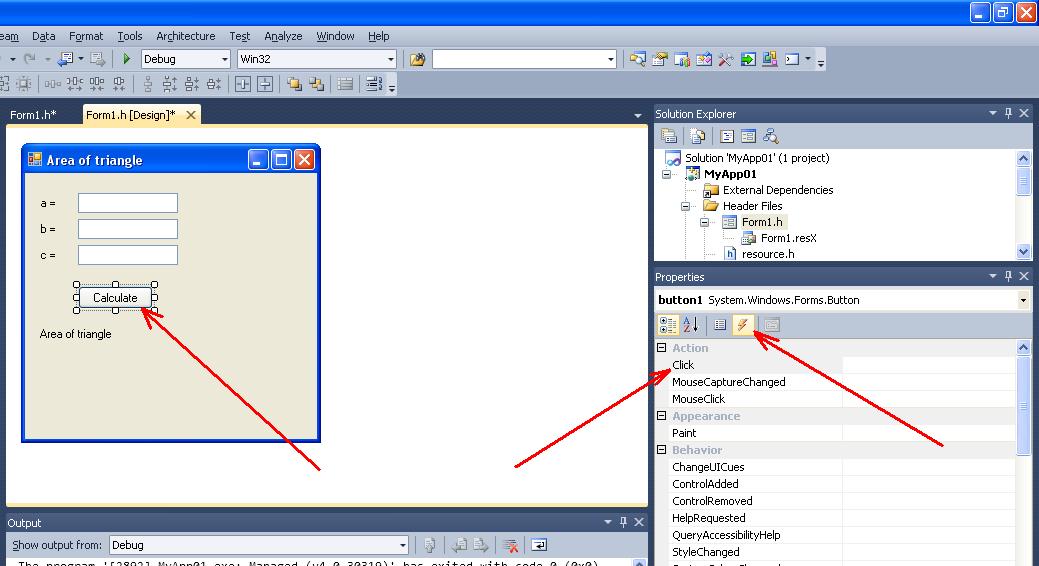 Figure 14. Calling of event handler “Click“
As a result, Microsoft Visual Studio will form the event handler and will switch the window into the mode of entering the program code.
Event handler (method) is named button1_Click(). The following program code is formed:
private: System::Void button1_Click(System::Object^ sender, System::EventArgs^ e)
{


}
Between the braces you need to enter your own code of calculating the area of triangle using Heron’s formula.
Listing of program code of event handler button1_Click() is following:
private: System::Void button1_Click(System::Object^ sender, System::EventArgs^ e)
{
 float a, b, c, p, s, t;

 a = System::Double::Parse(this->textBox1->Text);
 b = System::Double::Parse(this->textBox2->Text);
 c = c.Parse(this->textBox3->Text);

 p = (a + b + c)/2;

 t = p * (p-a) * (p-b) * (p-c);

 if (t<0)
   label4->Text = "Error of data entry!";
 else
 {
   s = (float)Math::Sqrt(t);
   label4->Text = s.ToString();
 }
}
Let’s explain some code snippets.
To convert the value of component textBox1->Text from string into a float type is used method Parse() from System::Double class.
To set the value textBox1->Text into the variable a of float type you can use one of two ways:
a = System::Double::Parse(this->textBox1->Text);
or
a = a.Parse(this->textBox1->Text);
Pointer “this” is a pointer at given class (Form1).
To calculate the square root is used function Sqrt() from class Math():
s = (float)Math::Sqrt(t);
To convert from type float into a string is used method ToString():
label4->Text = s.ToString();
⇑
5. Running the project.
Now you can run the application (F5 key) and test it.