Development the program where to solve the problem is used “switch” statement. The ComboBox control
In this paper, an example of a program in which to solve the problem is used a “switch” statement and a ComboBox control.
The task
Develop a program, that by the entered value of the radius R and the task will provide the user with services in the calculation:
- 1 – circumference;
- 2 – square of a circle;
- 3 – volume of a sphere.
The circumference is calculated by the formula:
D = 2 · π · R
The area of a circle is calculated by the formula:
S = π · R²
The volume of a sphere is calculated by the formula:
V = 4/3 · π · R³
To select the option of solution, you need to use ComboBox control. To calculate use the “switch” statement.
Progress
1. Create the project
Run Microsoft Visual Studio. Create the project from a template “Visual C++ – Windows Forms Application“. Automatically, the main form of application named Form1 is created. Example of application based on the Windows Forms Application template is given here.
2. Create the main form of application
Create the main form of application as shown in Figure 1.

Figure 1. Main form of application
From the Toolbox panel the following controls are placed:
- control named label1 of type Label to displaying the message “R = “;
- control named button1 of type Button for calculations;
- control named textBox1 of type TextBox for input the radius R;
- control named comboBox1 of type ComboBox for selecting of calculation option (Figure 2);
- control named label2 of type Label to show the result.
A more detailed example of creating a form is described here.

Figure 2. Placement of ComboBox control
3. Setting up the controls Label, Button
Set up following properties of controls (Figure 3):
- in the control label1 property Text = “R = “;
- in label2 property Text = “Result = “;
- in button1 property Text = “Calculate“;
- in the main form Form1 property Text = “The switch statement“.
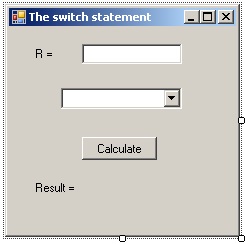
Figure 3. Main form after setting properties label1, label2, button1
4. Setting the properties ComboBox
In “comboBox1” control you need to display three strings:
- 1 – circumference;
- 2 – area of a circle;
- 3 – volume of a sphere.
For this is used the Items property (Figure 4).
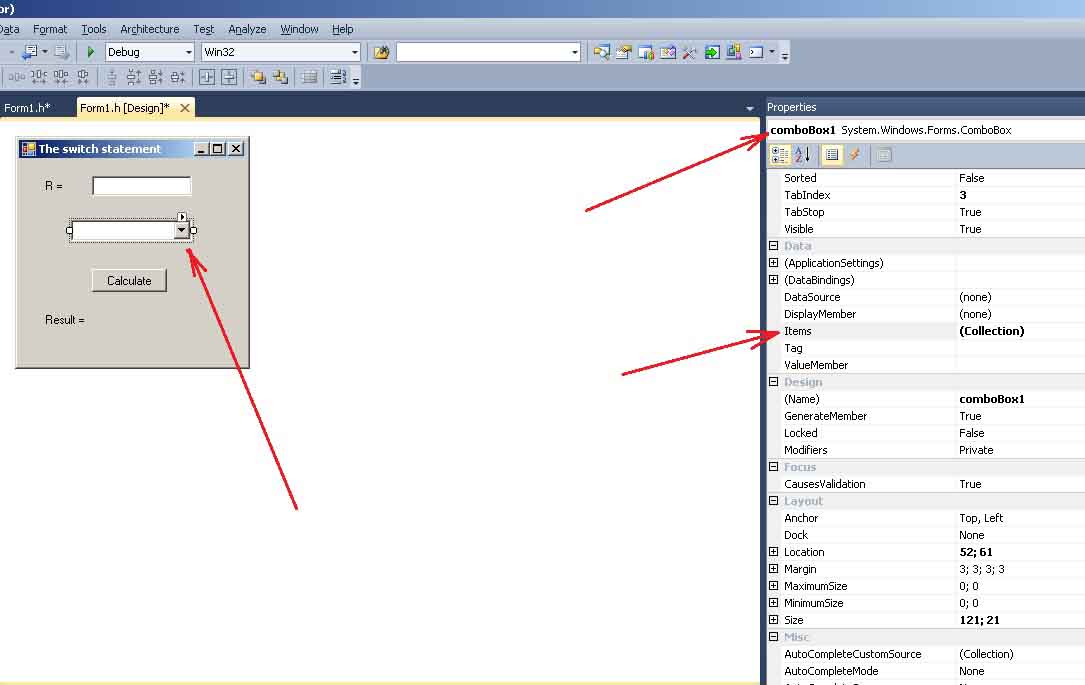
Figure 4. Property Items of comboBox1 control
After selecting the icon “…” in the “Items” property window, will open the string editor of “comboBox1” control. In the editor you need to type (Figure 5):
1 – circumference
2 – area of a circle
3 – volume of a sphere
Each string has one option of choice in comboBox1.
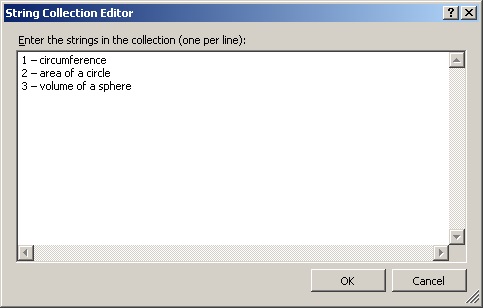
Figure 5. Input the strings comboBox1
To customize the appearance of the display drop-down list, in the ComboBox control is implemented DropDownStyle property (Figure 6).
This property can take one of three values:
- Simple. In this case there is no choice button of items list;
- DropDown. In this case, you can select items from the list and enter your own items to the list;
- DropDownList. In this case, you can only read items from the drop-down list.
With values Simple and DropDown is associated Text property, which sets the initial text that appears in ComboBox.
In this case, you need to install DropDownStyle property to DropDownList.
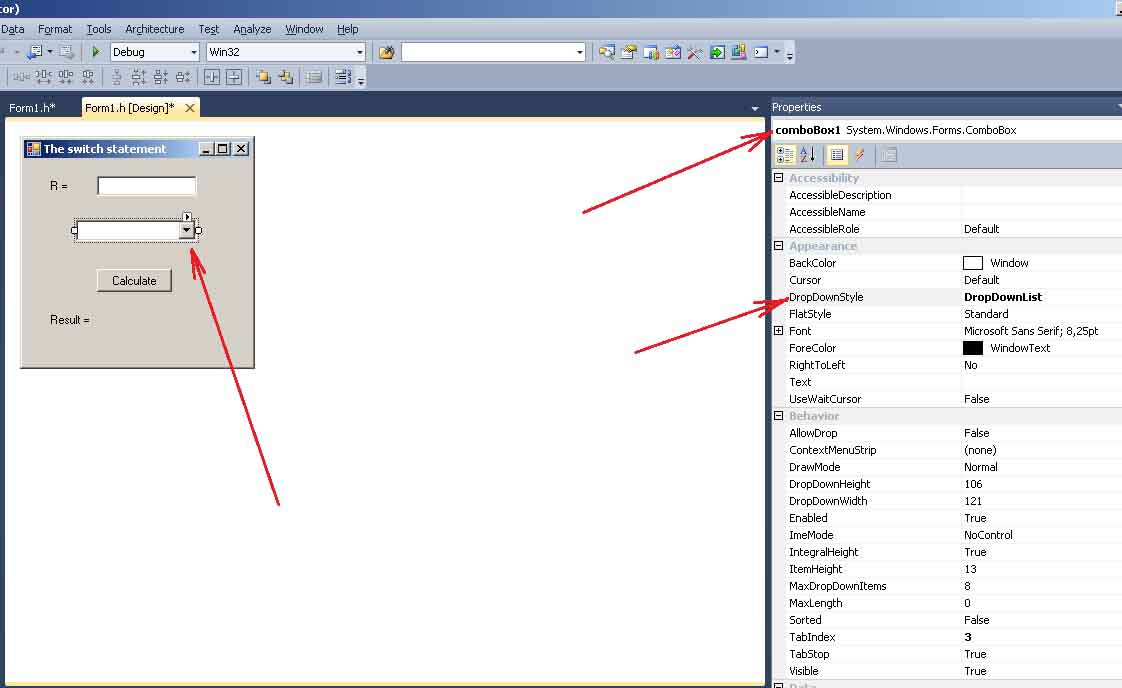
Figure 6. Property DropDownStyle
Also, the FlatStyle property affects to the window type of drop-down list box.
5. Programming the event Load of form activation
After starting the program to perform one of the first generated by the Load event. Load event handler is used to set the initial values of the controls and the internal variables of the program.
In the Load event handler of form activation it is advisable to put the initialization code of comboBox1 control.
To access the Load event handler of the main form Form1, perform the following actions (see Figure 7):
- go to the form design mode “Form1.h [Design]“;
- select (activate) the form Form1;
- in the Properties window select the tab Events;
- double-click opposite the field of Load event.
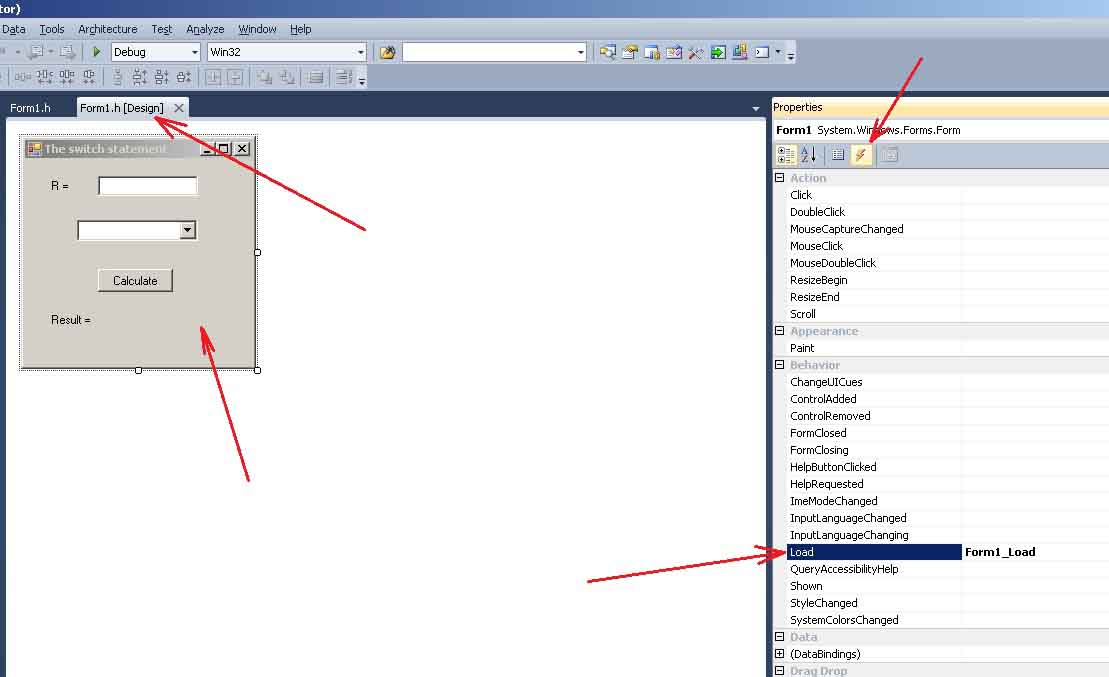
Figure 7. Programming the “Load” event
Listing of event handler is following:
private: System::Void Form1_Load(System::Object^ sender, System::EventArgs^ e)
{
    comboBox1->SelectedIndex = 0;
    textBox1->Text = "0";
}
In the above code, in comboBox1 list, is set the active element with the number 0. This is achieved by using the SelectedIndex property. Numbering in the list comboBox1 starts at zero.
In the following listing is an example of the formation of the list comboBox1 programmatically. This code is advisable to put the in Load event handler of the main form of the program.
...

// clear the list of elements comboBox1
comboBox1->Items->Clear();

// create a list of items comboBox1
comboBox1->Items->Add("1 - Circumference");
comboBox1->Items->Add("2 - Area of a circle");
comboBox1->Items->Add("3 - Volume of a sphere ");

...
In the above listing are two methods used:
- Clear() method that clears comboBox1;
- Add() method, which adds to comboBox1 a string (selection element).
6. Programming the click event on the button “Calculate“
Example the Click event programming is described here in detail.
The event handler click on the button “Calculate” is as follows:
private: System::Void button1_Click(System::Object^ sender, System::EventArgs^ e)
{
    const float pi = 3.1415f;
    float r, d, s, v;

    r = r.Parse(this->textBox1->Text);

    switch (comboBox1->SelectedIndex)
    {
        case 0:
            d = 2*pi*r;
            label2->Text = "Circumference = " + d.ToString();
        break;
        case 1:
            s = pi*r*r;
            label2->Text = "Area of a circle = " + s.ToString();
        break;
        case 2:
            v = 4.0/3.0*pi*r*r*r;
            label2->Text = "Volume of a sphere = " + v.ToString();
        break;
    }
}
For the organization of the selection of the three options is used the switch statement.
The selector is used the property
comboBox1->SelectedIndex
7. Run the application
Now you can run the application.