Connecting the database to the Windows-based application
Contents
- 1. Run Borland C++ Builder 2007
- 2. Preparation of the database file
- 3. Component TADOConnection
- 4. Property ConnectionString
- 5. Property “LoginPrompt”
Search other websites:
Task
The database is given in the file “db1.mdb”, which was formed in Microsoft Access. Database contains three tables. We need connect database to the Windows-application in C++ Builder.
⇑
Progress
1. Run Borland C++ Builder 2007
An example of creating Windows application is described here.
⇑
2. Preparation of the database file
It is recommended to copy the database file in the folder with files of application which is developed. This step is optional.
⇑
3. Component TADOConnection
Since according to problem condition we have database which was generated in Microsoft Access then to work with it are suitable components from tab dbGo.
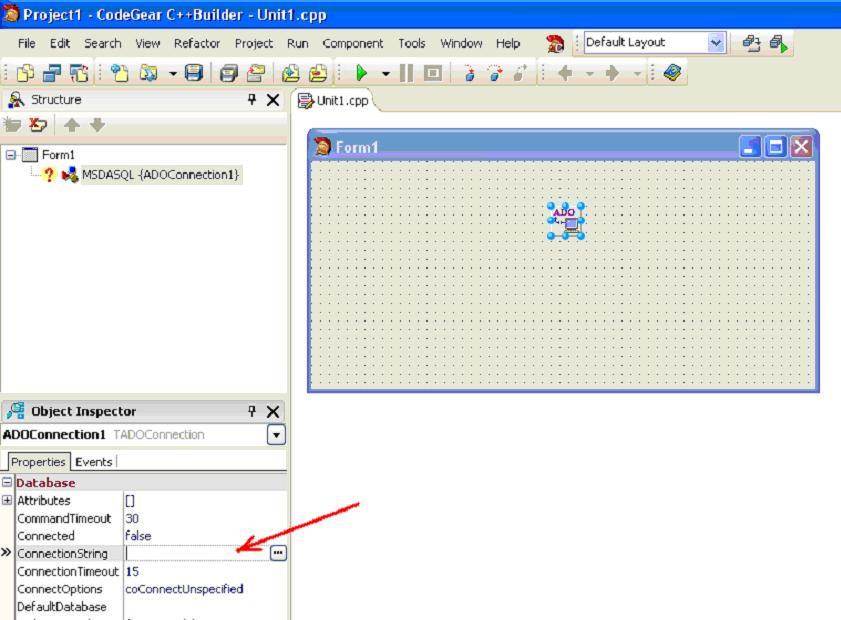
To connect to the database we need use component TADOConnection. Place this component on the main form of application (fig. 1).
Fig. 1. Component TADOConnection
In Object Inspector to this component will correspond the object-variable ADOConnection1 (property Name).
⇑
4. Property ConnectionString
To connect to database we need set up property ConnectionString of ADOConnection1 component (fig. 2).
Fig. 2. Property ConnectionString
Setting the ConnectionString property is implemented with the help of wizard. To call the wizard we need click on the button “…” in field of ConnectionString property. As a result the window in which we need select a connection source will be opened (fig. 3).
Fig. 3. Window of selecting a connection source
System proposes two variants of selection the source of link. First variant “Use Data Link File” uses files of connection with data (it has extension “*.udl” and “*.dsn”), which use a program interface ODBC to access to databases. In the second variant we need to set the connection string with database file. In our case we select second variant and click at “Build…” button.
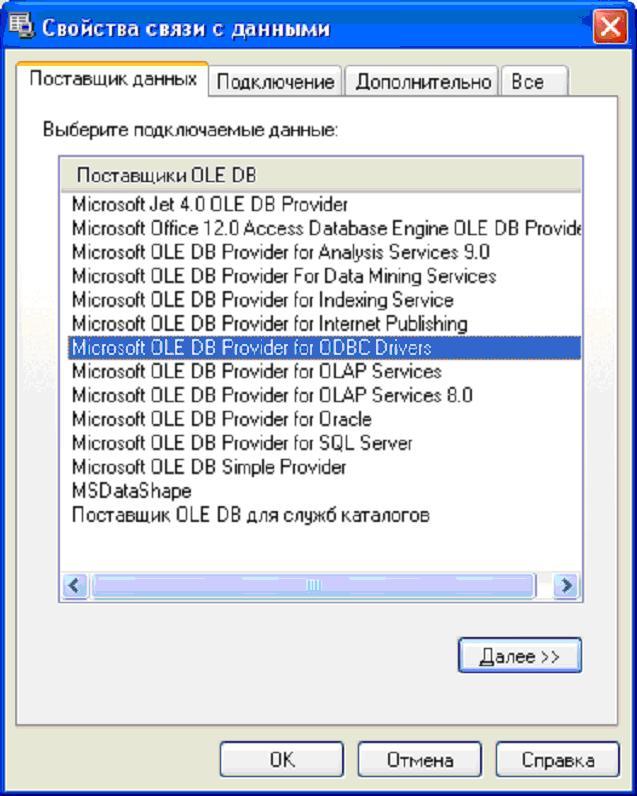
Window “Свойства связи с данными” opens. In this window we need select a providers OLE DB.
Fig. 4. Window “Data Link Properties”
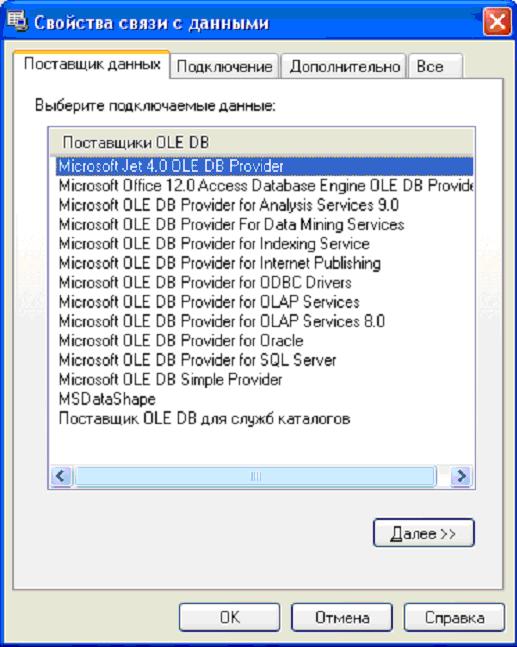
In our case we select “Microsoft OLE DB Provider” (fig. 5). We press on the button “Далее>>” after that the tab “Подключение” will be activated.
Fig. 5. Selection “Microsoft Jet 4.0 OLE DB Provider”
Next step is the selection of database file. In the field “1. Выберите или введите имя базы данных” we select the button “…”. The standard window of file selection will be opened (fig. 6).
Fig. 6. The selection of database file
We find the file (it must be in folder with all program files) and click on “Открыть” button. It should be noted that in the “Files of Type” will set to “Databases Microsoft Access (* .mdb)”.
After selecting of database file we are testing the connection by clicking on the button “Проверить подключение”. If all will be done right, then the system will show following window (fig. 7).
Fig. 7. Window of data connection
Click on the “OK”. In the next window “Свойства связи с данными” click on “OK”.
In previous window “Form1->ADOConnection1 ConnectionString” the connection string with database “db1.mdb” will be formed.
Fig. 8. Window “Form1->ADOConnection1 ConnectionString”
After that our application will be connected to database Microsoft Access, which is placed in file “db1.mdb”.
⇑
5. Property “LoginPrompt”
In order to you don’t enter your password and login name every time when you connect to the database, it is recommended LoginPrompt property ADOConnection1 component set to value “false”.
After that we can connect other components, which ensure the work with database and its visualization in the application.


