Creating a database tables with the help of Database Desktop utility
Contents
Task
1. Using Database Desktop utility, create a database table that has the following structure.
|
Field name |
Data type |
Key field |
Explanation |
|
ID_Product |
Counter |
+ |
The unique identifier of field |
|
Name |
Text |
– |
Name of product |
|
Price |
A floating point number |
– |
Price of product |
|
Count |
Integer number |
– |
The number of units of product |
2. Input the data for created table (5 records).
Instructions
1. Run “Database Desktop” utility
We can run the “Database Desktop” utility by two methods:
- using the menu “Start” from Windows folder in which Delphi is set;
- using the command “Database Desktop” from menu “Tools” (fig. 1).
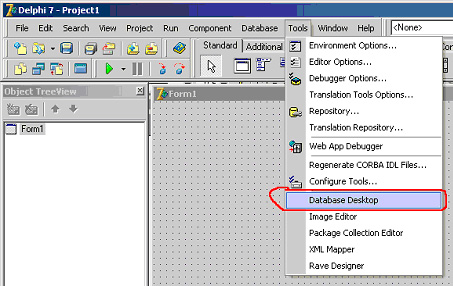
Fig. 1. Run the utility “Database Desktop” from Delphi
2. The “Database Desktop” window
The view of window of “Database Desktop” program after running is shown at figure 2.
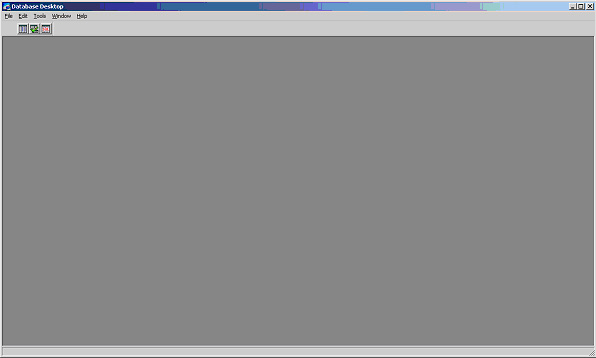
Fig. 2. The window of “Database Desktop”
Utility “Database Desktop” allows to create, to modify and to do queries to tables of database in different formats, such as Paradox, dBase, SQL.
3. Creating an alias of database
First of all we create database. Database can contain any number of tables, that is connected between them by several fields.
To create an alias of database we need to call the “Alias Manager…” command from menu “Tools” (fig. 3).

Fig. 3. Creating a database alias
As a result the window “Alias Manager” will be opened (fig. 4).
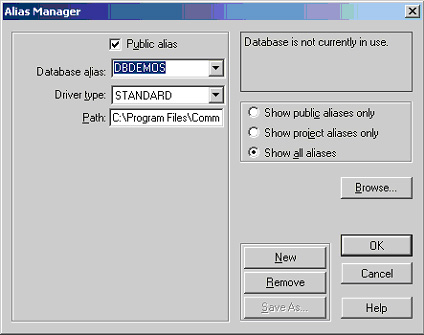
Fig. 4. Window “Alias Manager” for creating database aliases
In the window some fields have next meaning:
- the field “Database alias” shows the alias of database which will be created. Also, in this field, you can view the existing aliases of databases, which are registered in the system;
- the field “Driver Type” shows the type of driver for database access;
- the field “Path” shows the path to the folder, in which the database tables are placed.
To create the alias of database we need click on the “New” button. The window “Alias Manager” will have next view (fig. 5):
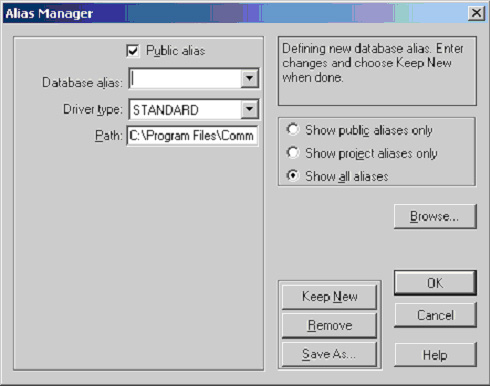 Fig. 5. Input of name of database alias
In the field “Database alias:” type the name of the database, for example “myDb”.
At the next step call the “Browse…” command in order to specify the path to database tables (the field “Path” must be filled). As a result, the window “Directory Browser” opens, which is approximately the following form (fig. 6):
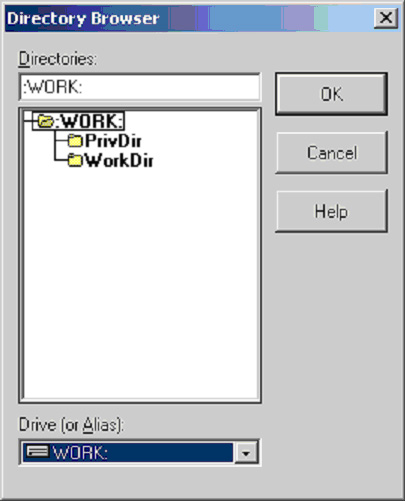
Fig. 6. Window of selecting path to database tables
In the bottom of window in field “Drive (or Alias):” we select drive, on which will be placed database tables of program (for example, drive D:). After that in field “Directories” we select the folder with files of database tables. The view of window “Directory Browser” with the filled fields will have the approximately following view (fig. 7):

Fig. 7. The selection of path to the database tables
We confirm our selection by clicking on the “OK” button and we return to previous window “Alias Manager” (fig. 8).
After setting of the path, the field “Path” will be changed in window “Alias Manager”.

Fig. 8. The Window with created alias of database and the path to it
In the field “Driver type” we leave the type of driver “STANDARD”. Confirm the selection by clicking on the “OK” button. As a result, you are prompted to confirm the entry of the new alias to the configuration file “IDAPI32.CFG” by displaying the following screen (Fig. 9).
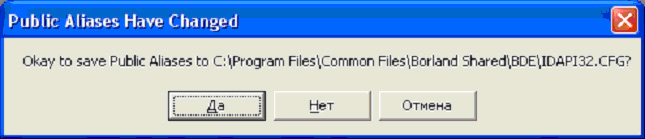
Fig. 9. The proposition to confirm the changes in configuration file “IDAPI32.CFG”
Confirm the change in the configuration file by clicking “OK“.
4. Creating a database table
After the previous steps we have a new database with the alias “myDb” and the folder in which will be stored database tables.
To create a table we need to call the command sequence (Fig. 10)
File -> New -> Table...
 Fig. 10. Command of creating database tables
As a result the next window will be opened (fig. 11):
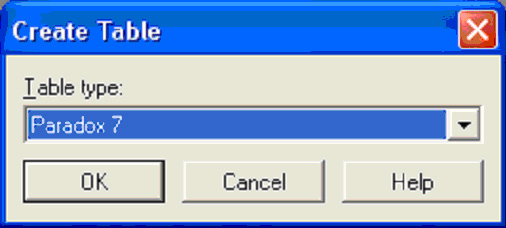 Fig. 11. Window of creating of database table
We leave all as is, and we click on “OK“.
Next window proposes to create a table (fig. 12).
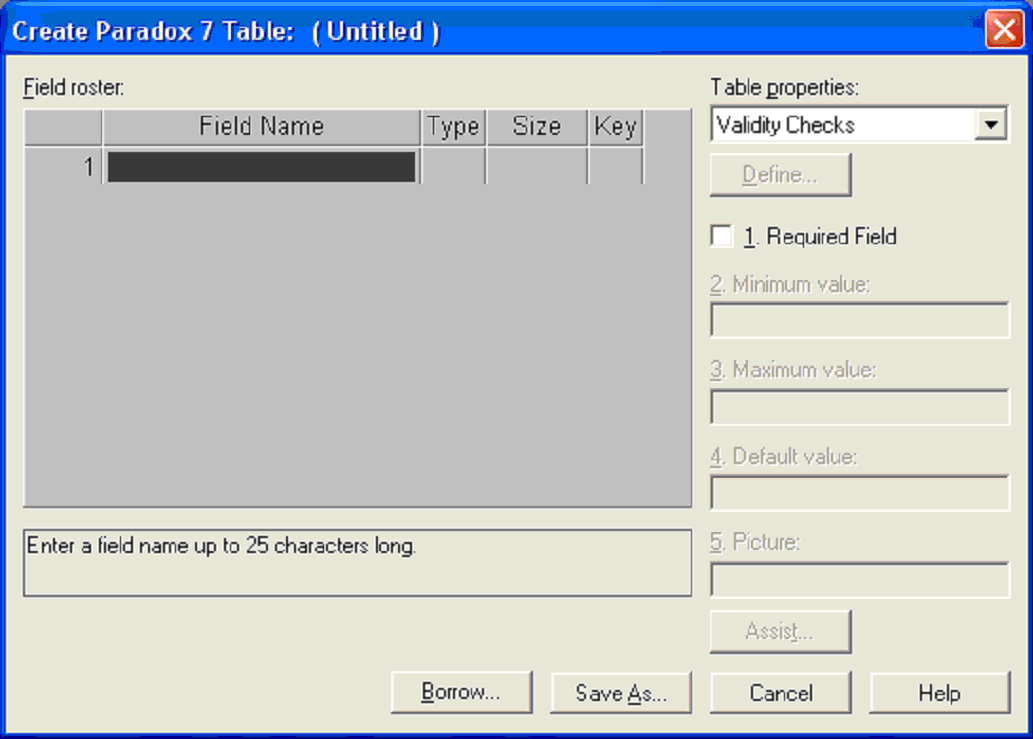
Fig. 12. Creating a database table
The window contains several areas.
Area “Field roster” is designed to create the table structure.
Area “Table Properties” allows you to set the table properties. The properties are selected from the list and they are as follows:
- Property “Validity Checks” allows you to set the maximum and minimum values in the records of the table by setting default values;
- With the property “Table Lookup” we can set a lookup table to select values from another table;
- Property “Secondary Indexes” allows you to set the secondary indexes;
- Property “Password Check” allows you to set a password to access the table;
- Property “Table Language” allows you to set the language of the table.
In this case, no change in the properties of the table we will not do.
In the “Field Roster” we create a table structure as shown in Figure 13.
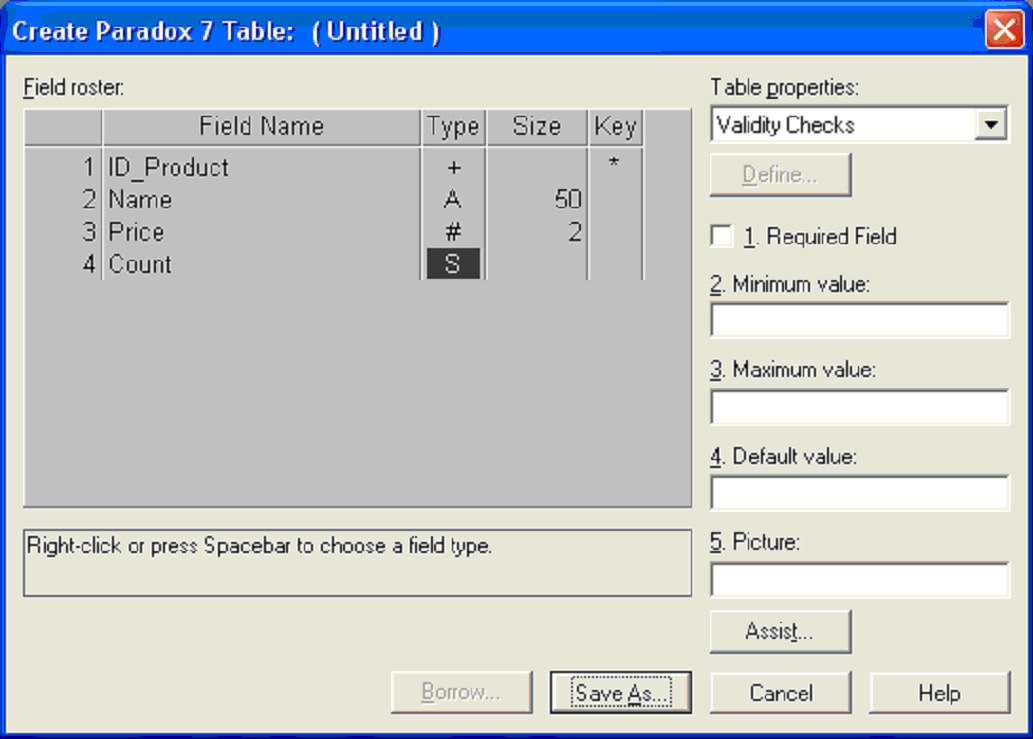
Fig. 13. Creating of structure the database table
The column “Field Name” we input the field names of the table.
In the column “Type” using the gap or the context menu (right mouse button) enter the type of the field. We set the following data types:
- for the field ID_Product we specify the type of “+/- Autoincrement” (counter);
- for the “Name” field we specify the type of “Alpha” (text);
- for the “Price” field we specify the type of “# BCD” (float);
- for the “Count” field we specify the type Short (integer).
Column “Size” allows set the length of field. For example, for a field Name, which is a string of characters, set the maximum length to 50 characters. For field Price, which is a floating point number, set the number of digits after the decimal point of 2. Column “Key” is set as primary key. The “ID_Product” field is a counter, because it is primary key (mark “*”). Setting and removal of the primary key is performed by pressing the spacebar.
After creating a structure of table we call “Save As…” command. Window “Save Table As” opens (fig. 14).
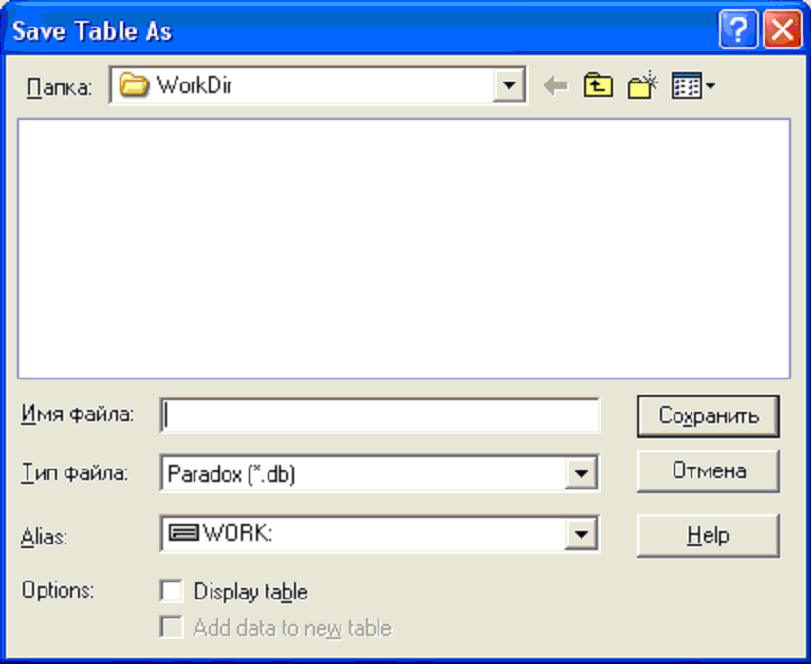
Fig. 14. Adding a table to database “myDb”
In the window in field “Alias” from the dropdown list we select the alias “myDb” of our, newly created, database. Automatically the corresponding folder will be set (see item 3). In the field “File name” we specify the name of new table “product” (fig. 15).

Fig. 15. Entering the table name “product.db“
Save the table by clicking at the “Save” button. As a result, in folder of database with alias “myDb” appear a file of the table “product.db” in Paradox format.
5. Making changes to the table
Program “Database Desktop” allows to input data into database tables.
For this from main menu of program we need to call the sequence such commands (fig. 16):
File->Open->Table...

Fig. 16. Calling the command to open the table
The window of table selecting will be opened, in which, first of all, we select the alias (field “Alias”) and then we select the table “product.db” (fig. 17).
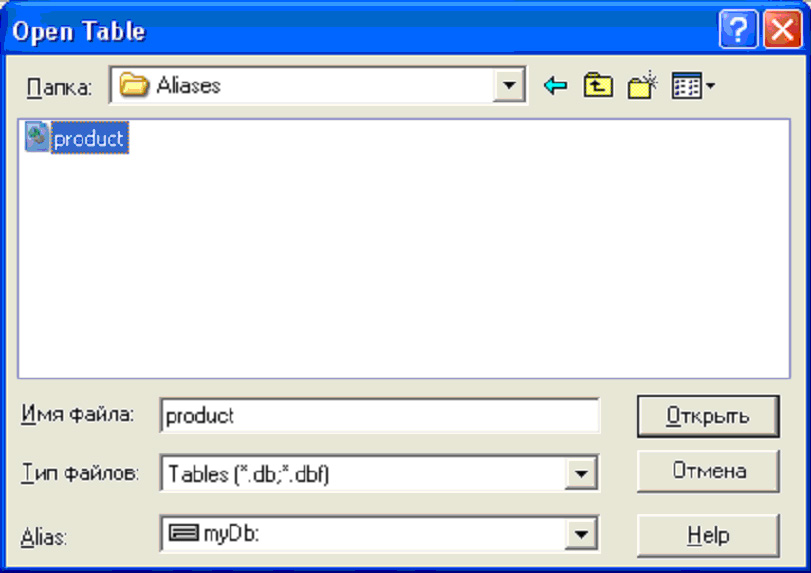
Fig. 17. Selecting the table “product.db” from database “myDb”
After opening table the program window will have next view
(fig. 18).

Fig. 18. Window with the opened table “product.db”
To make changes to the table we need to switch it into edit mode. This is done by a command “Edit Data” from the menu “Table” (Fig. 19).
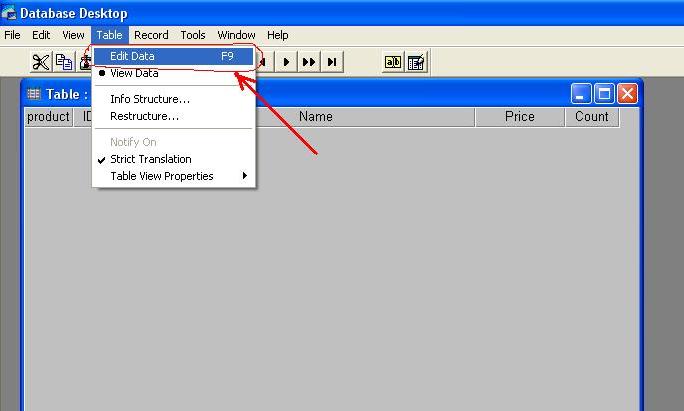
Fig. 19. The command to transfer the table in the edit mode
Now we can enter data in table. Fill data in table approximately as shown on figure 20.

Fig. 20. Filling the data of table “product.db”
Close the table. Thus, the table is created using the utility “DatabaseDesktop“.