Example of creating a main menu. Component TMainMenu
Contents
Task
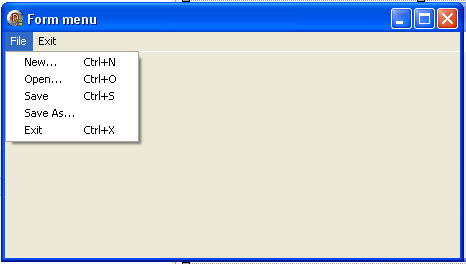
We have a form of application. Using Embarcadero Delphi 2010 we need to create a menu as shown at figure 1.
Fig. 1. Menu of application, which we need to create
Instructions
1. Run Delphi. Save the project
Example of creating the project using VCL Forms Application template is described here. Save the project.
2. Creating a main menu
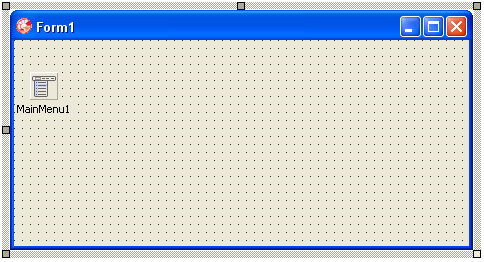
Place on the form component TMainMenu from component palette Standard (Fig. 2). Object (variable) with name MainMenu1 is forming.
Fig. 2. The main form of application with component MainMenu1
Call the mode of forming menu (fig. 3). It carry out by two ways:
- double click by “mouse” at the component MainMenu1;
- calling the command “Menu Designer…” from context menu.
Fig. 3. The command of selecting of window of creating menu
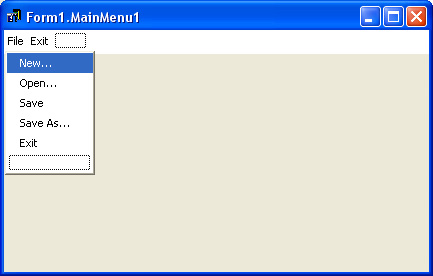
As a result of calling “Menu Designer…” the window of forming menu will be opened (fig. 4).
Fig. 4. Window for creating menu
In the menu cells we input corresponding names of elements (commands) using property “Caption” for each element of menu. You can create a complex structure from drop-down submenu. In our case we create the menu as shown at figure 5.
Fig. 5. Formed menu
Menu “File…” contains the submenu with commands:
- “New…“
- “Open…“
- “Save“
- “Save As…“
- “Exit“
Command, which is as menu “Exit“, hasn’t submenu.
3. Assigning the shortcuts for menu items
We will carry out the appointment of key combinations “Ctrl + N” for the command “New …” from the menu “File“. It means, when we will press the shortcut “Ctrl+N” the command “New…” will be called.
For this we need execute the following sequence of actions (fig. 6):
- activate the command “New…” into editor “Menu Designer…“;
- in “Object Inspector” put into property “ShortCut” the value “Ctrl+N” (select to drop-down list).
Fig. 6. Assignment the shortcut keys “Ctrl + N” to the command “New …” from the “File” menu
According to the conditions of the problem we appoint to other commands of menu the corresponding shortcuts. Window “Menu Designer…” will have the view as shown at figure 7.
Fig. 7. Window “Menu Designer” after the final formation
4. Run the application
After that we can test the application and can run it. The application window will have the view as shown at figure 8.
Fig 8. Application in the executing mode with the detailed menu “File”
After performing the operation, you can program the events that will be handled by a call of corresponding team.


